
Tropical Trouble Instructions Booklet
This guide assumes basic familiarity with RC soldering (XT30 connectors & motor leads) and metric hex drivers. For interactive 3D step-by-step exploded views, open the official Cadasio 3D Interactive Assembly Presentation alongside this booklet. Need help? Email help@latenightcombat.com or join our Discord Server.
1. Introduction & Design Philosophy
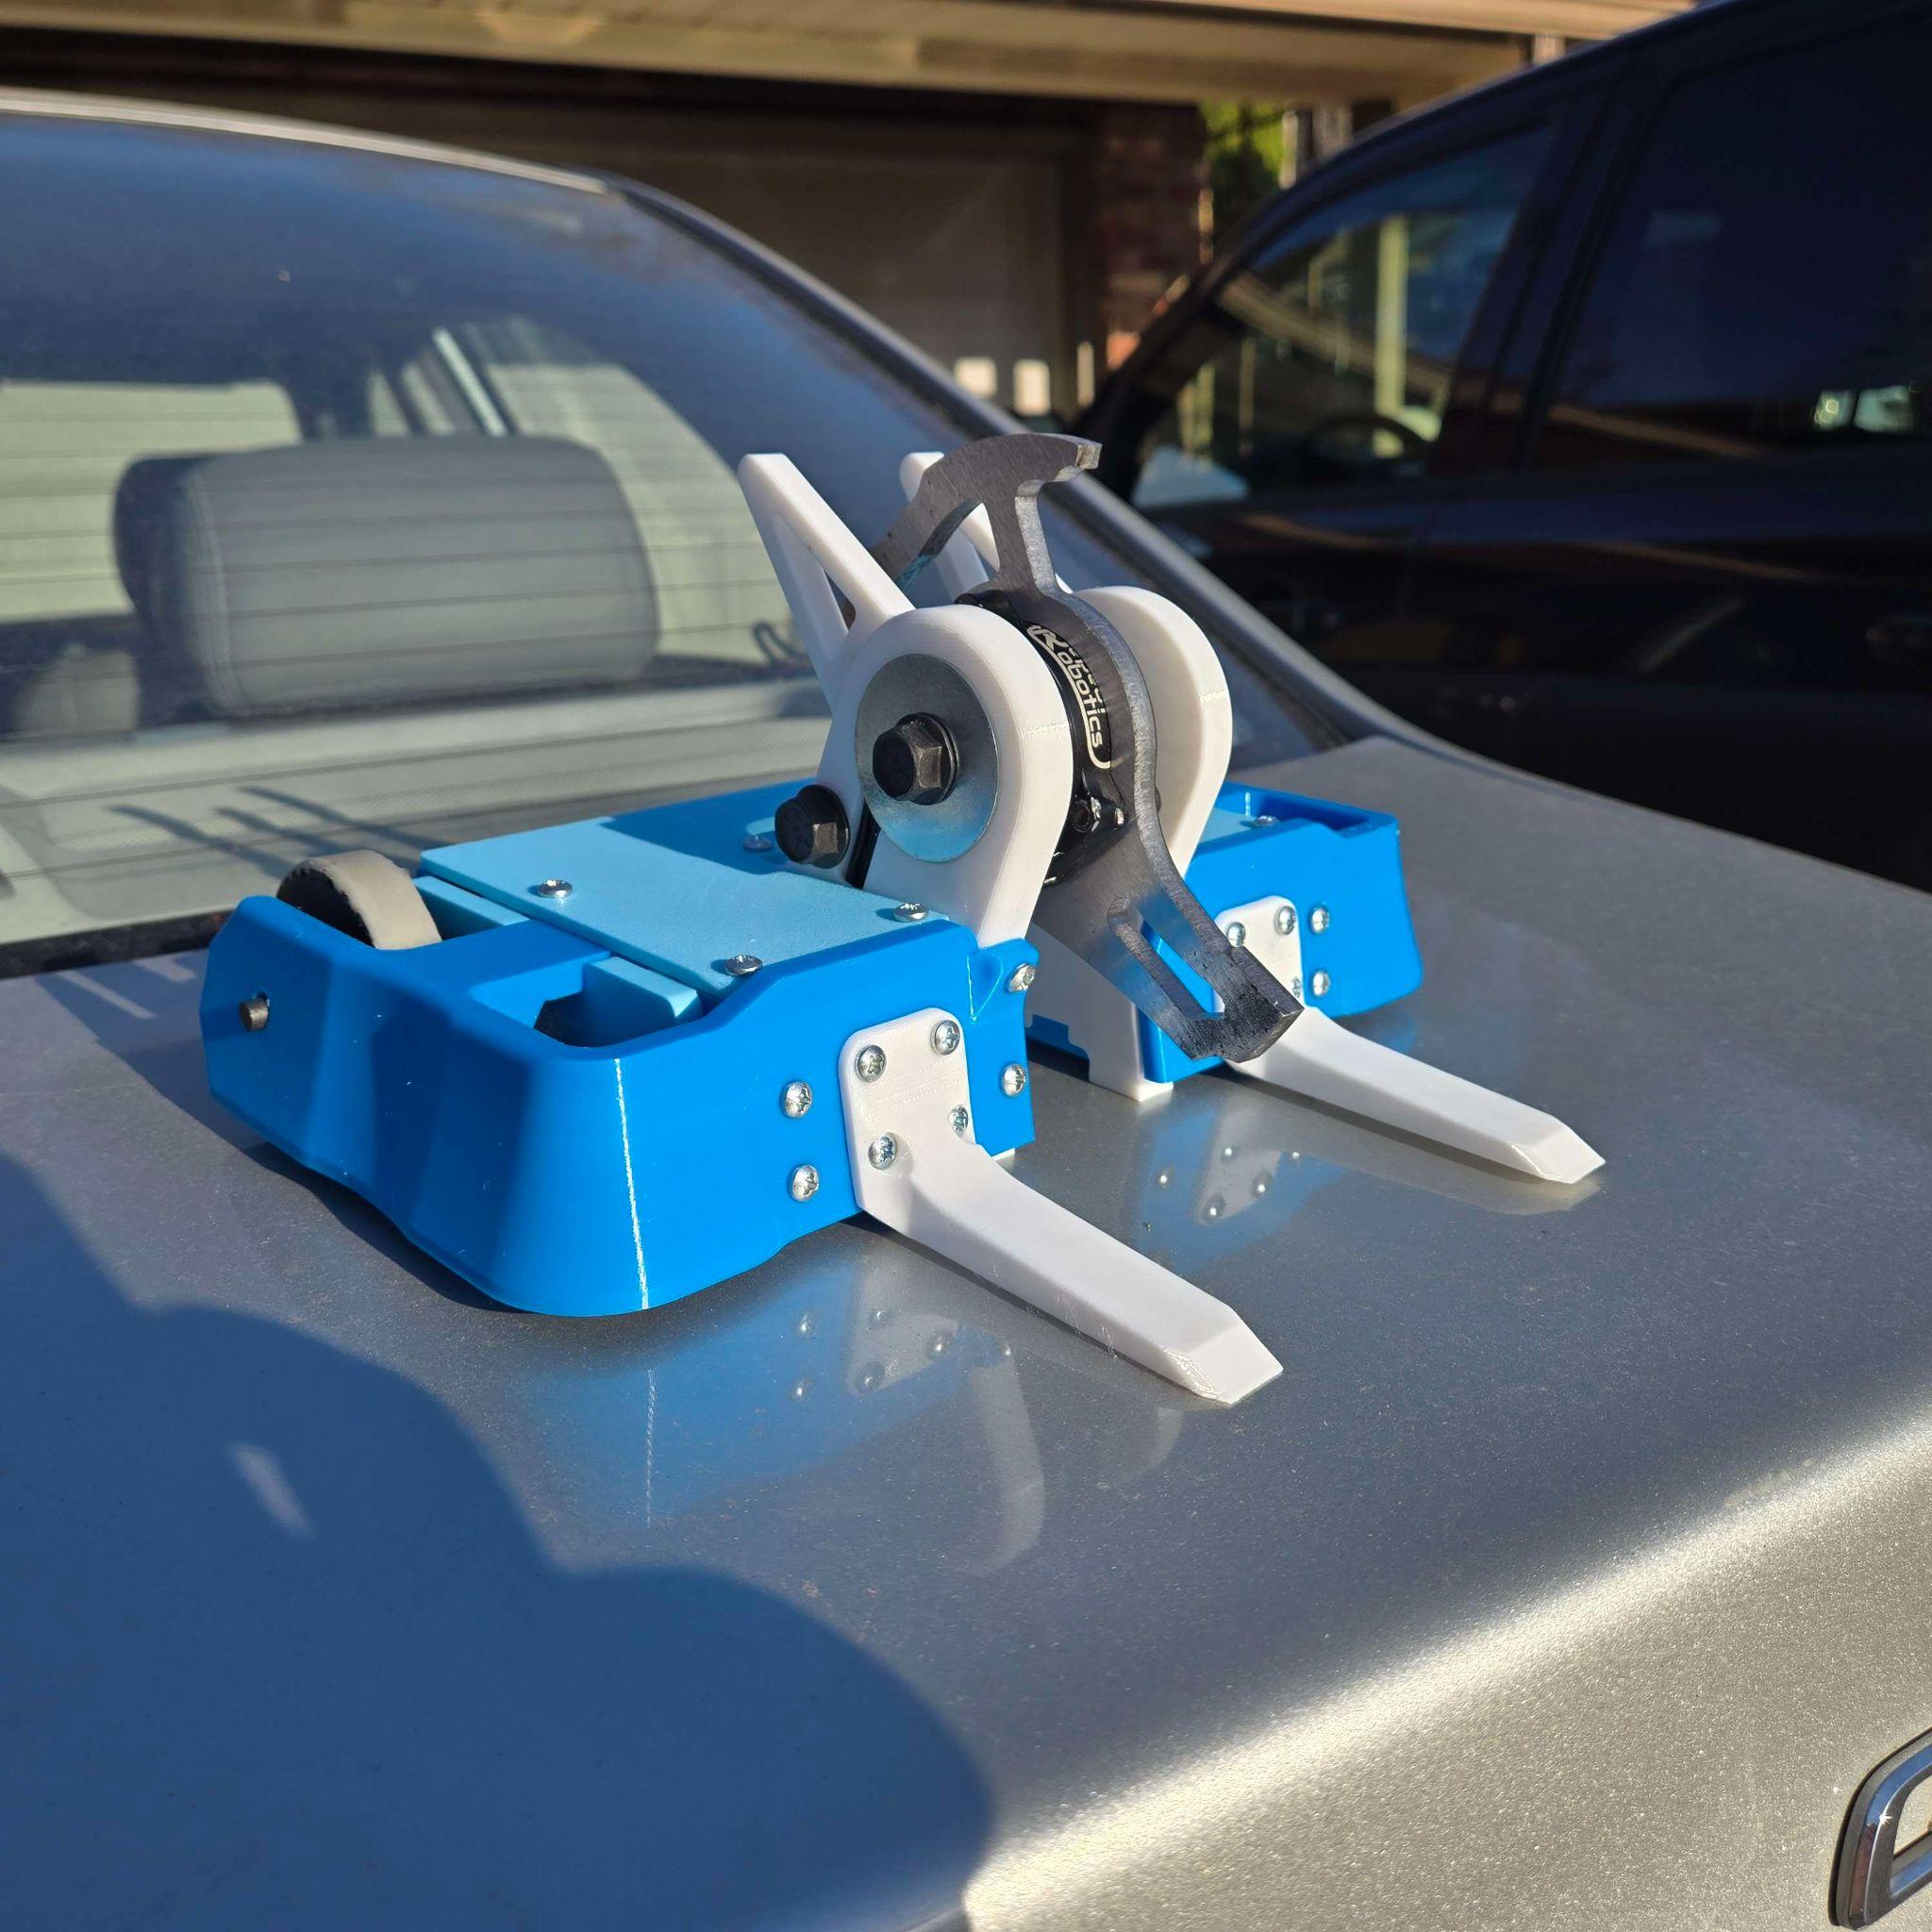
Tropical Trouble was created to lower the barrier of entry into competitive 3lb (Beetleweight) combat robotics. Based directly on the championship-winning architecture of Pipeline Punch (2024 MRCA Champion, NHRL Top 8), every structural piece of Tropical Trouble is 100% 3D-printable on an entry-level $180 Bambu Lab A1 Mini (180×180mm bed).
The robot features a 4WD indirect timing-belt drivetrain with custom cast 45A Vytaflex urethane wheels and a 6" diameter AR500 dual-disk vertical spinner driven by a Repeat Robotics 2812 brushless hubmotor capable of 217 MPH tip speed.
2. What Is Included vs. Required to Complete
Included in the Full Kit ($440)
- 3D-Printed 95A TPU Unibody Chassis, Uprights, Wheel Guards, Top Lid & Forks
- 2× AR500 Steel Weapon Disks (6" Diameter) + Aluminum Center Spacer
- 1× Repeat Robotics 2812 Brushless Hubmotor + 40A Brushless Weapon ESC
- 2× Repeat Drive Brushed MK3 Gearmotors + Dual Brushed Drive ESC
- 4× Cast 45A Urethane Wheels (2 Front Indirect, 2 Rear Direct Hubs)
- 2× GT2 Timing Belts, Flanged Bearings, Bronze Bushings & FingerTech Power Switch
- Complete Metric Fastener & Heat-Set Insert Hardware Pack + Weapon Lock
Required to Complete (Not Included)
- Transmitter & Receiver: Radiomaster Pocket (ELRS) + Radiomaster ER4 PWM Receiver (or equivalent 2.4GHz system)
- Battery: 4S 450mAh–650mAh LiPo / LiHV Pack with XT30 connector (e.g. Palm Power or GNB 4S 550mAh 90C)
- LiPo Balance Charger: ISDT Q6 Nano, Hota D6 Pro, or SkyRC B6Neo
- Basic Workbench Tools: Soldering iron + 60/40 rosin-core solder, 1.5mm / 2.0mm / 2.5mm hex drivers, M3 nut driver, Blue Loctite 242/243, and flush cutters
3. Complete Bill of Materials (BOM)
| Category | Part Name / Specification | Qty | Source / Notes |
|---|---|---|---|
| Weapon Motor | Repeat Robotics 2812 Brushless Hubmotor (1300KV) + 40A AM32 ESC | 1 | Repeat Robotics |
| Weapon Disks | 6" AR500 Asymmetric Vertical Spinner Disks (0.125" / 3.2mm thick) | 2 | SendCutSend / Kit Included |
| Drive Motors | Repeat Drive Brushed MK3 Gearmotors + Repeat Dual Brushed ESC | 2 | Repeat Robotics |
| Master Switch | FingerTech Mini Power Switch (40A rated) | 1 | FingerTech Robotics |
| Drivetrain Belts | GT2 Closed-Loop Neoprene Timing Belt (6mm Width, 70 Teeth / 140mm) | 2 | Gates / Powge GT2-140-6 |
| Front Wheel Bushings | Flanged Sleeve Bearing / Bronze Bushing (5mm ID × 7mm OD) | 4 | McMaster-Carr / Kit Hardware |
| Chassis & Armor | 95A TPU Unibody Frame, Uprights, Wheel Guards, Lid, and Forks | 1 Set | Bambu Lab 95A HF TPU / Kit Included |
4. Step-by-Step Mechanical Assembly
4.1 Heat-Set Insert Installation
Set your soldering iron to 210°C–220°C using a M3 heat-set tip (or conical tip). Press the brass M3 heat-set inserts flush into the top perimeter of the TPU chassis and the bottom of the weapon uprights. Allow 60 seconds to cool before threading fasteners.
4.2 Weapon Sub-Assembly
- Slide the first AR500 weapon disk onto the Repeat 2812 hubmotor can, aligning the mounting bolt circle.
- Place the machined aluminum spacer ring over the hubmotor barrel, followed by the second AR500 weapon disk.
- Apply Blue Loctite 243 to the M3 alloy steel button-head screws and tighten in a star pattern to clamp the dual disks and spacer evenly.
- Mount the stationary shaft ends into the left and right TPU weapon uprights and secure the uprights into the main TPU chassis pocket.
- Immediately install the printed Weapon Lock over the disks before proceeding to electronics installation.
4.3 Drivetrain & Indirect Belt Assembly
- Mount the two Repeat Drive Brushed MK3 gearmotors into the rear motor cradles using M2/M3 fasteners with a small drop of Blue Loctite.
- Press the bronze flanged bushings into both sides of the two front indirect wheels.
- Loop the GT2 timing belt around the front wheel pulley and rear drive wheel pulley as you slide the front axle bolt through the chassis sidewall and wheel guard.
- Slide the rear direct-drive hub wheel onto the D-shaft of the Repeat Drive gearmotor and tighten the set screw onto the shaft flat with Blue Loctite.
5. Electronics & Wiring Diagram
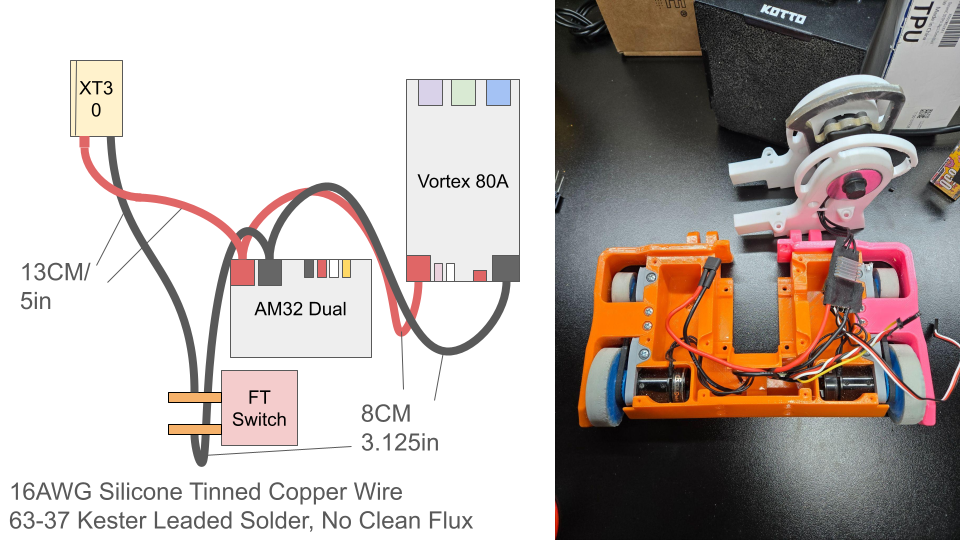
Follow the schematic below to wire your XT30 battery pigtail, FingerTech Mini Switch, Repeat Dual Brushed Drive ESC, Repeat 40A Brushless Weapon ESC, and 4-channel PWM Receiver:
5.1 Receiver Channel & Failsafe Setup
- Channel 1 (Steering / Aileron): Right Drive ESC signal lead (or mixed tank steering channel)
- Channel 2 (Throttle / Elevator): Left Drive ESC signal lead
- Channel 3 (Weapon Throttle): 40A Brushless Weapon ESC signal lead (Important: Disconnect the middle red +5V BEC wire from the Weapon ESC servo plug if your Drive ESC already powers the receiver!)
- SPARC / NHRL Failsafe Check: Configure your receiver failsafe so that when the transmitter is powered off, drive motors stop within 1 second and weapon throttle drops strictly to
-100%(disarmed).
6. 3D Printing & Bambu Studio Slicer Guide
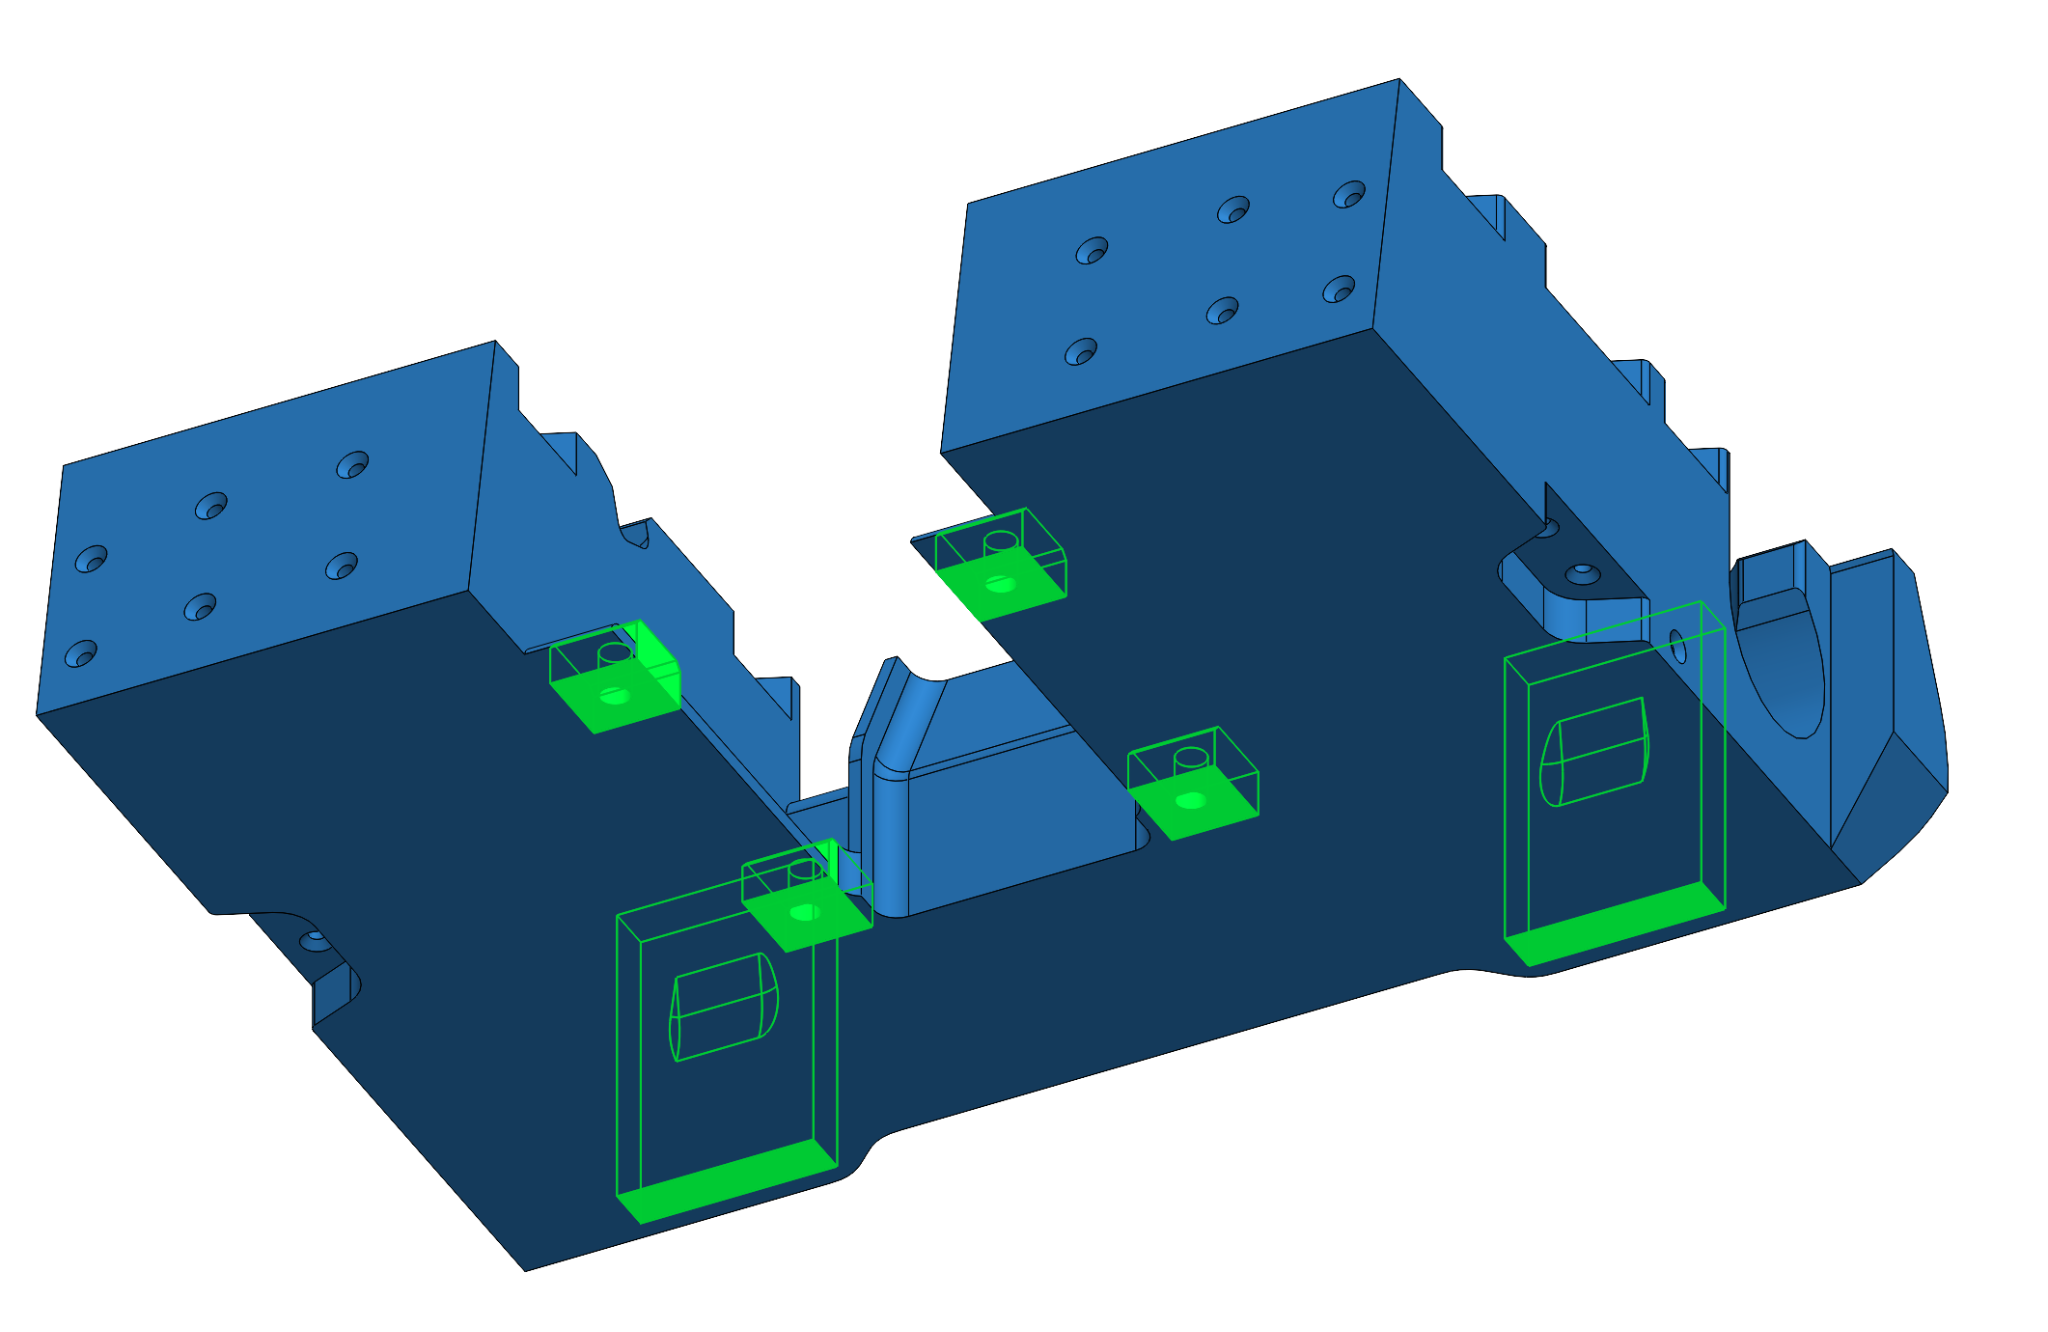
All Tropical Trouble structural parts are designed to print in 95A TPU (such as Bambu Lab TPU 95A HF or Overture High Speed TPU) with zero support material required on most parts. When opening the provided .3mf project files in Bambu Studio, verify the modifier mesh settings below:
| Component | Material | Wall Loops | Top / Bottom Shells | Infill Density & Pattern |
|---|---|---|---|---|
| Main Unibody Chassis (Base) | 95A TPU | 4 Walls | 4 Top / 4 Bottom | 25% Gyroid |
| Chassis Front Bulkhead Modifier | 95A TPU | 6 Walls | 5 Top / 5 Bottom | 50%–65% Gyroid |
| Weapon Uprights | 95A TPU | 6 Walls | 6 Top / 6 Bottom | 60% Gyroid |
| Wheel Guards & Forks | 95A TPU | 5 Walls | 5 Top / 5 Bottom | 40% Gyroid |
| Urethane Wheel Molds | PLA / PETG | 4 Walls | 5 Top / 5 Bottom | 25% Grid / Gyroid |